Monday, May 29, 2006

Hey, look! Crochet!


A little strawberry amigurumi I made up...he is so cute he makes me barf cotton candy.


It's nothin' tricky....in the round:
F hook, baby yarn.

ch2, 4 sc in 2nd ch from hook.

2 sc in each sc.

2 sc in first sc, 1 sc in next sc.

Continue like that , doing one more sc between increases until it's big enough, (I did it until 4) then sc even til you want to start decreasing, and start with 4 sc between decreases.

Leaf:


Ch6, join to form a ring. In ring, ch2, dc, tr with a picot on top, dc, ch 2, sl st in ring.Do that 5 times.

I used I-cord for his appendages, which is made with double pointed knitting needles.

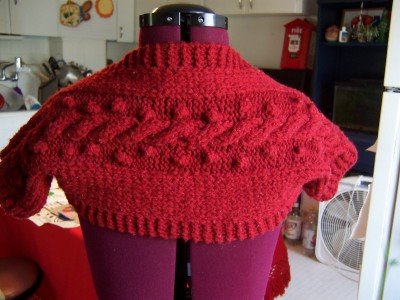
I also have a couple new bags in my Etsy shop. I used the Jordy bag technique for the lining and the square bottoms....I am so in love with the peach. i didn't use a pattern for the bag..there are lots of cabled bags out there, but if you really love this particular one, let me know and I'll post a pattern for it.


This is a square-bottomed knitted bag in red acrylic, fully lined with sturdy fabric, a crocheted button flap, a bodacious cable running down the middle and a cute little owl friend in the corner!


Knit in white acrylic yarn and fully lined with vintage fabric. It is 8"x7" and has a bodacious cable running down the middle, a sturdy crocheted button flap, and the Lucky Wings tag on the inside.It has a square bottom. The best part is Miss Georgia Peach hanging out in the corner!


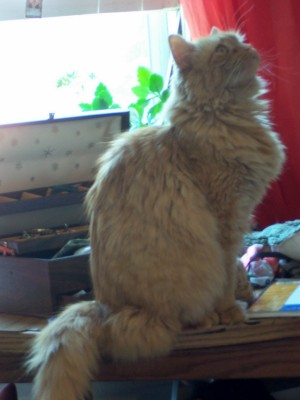
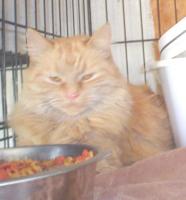
Oh, and the whole point I was posting was to show you a picture of my cat...I ended up calling him Bowie. Because I love David Bowie, and one of the most important things about names is that you have to enjoy saying them. There's a staaaaarcat, sleeping on the couch.....he is such a lover. Every morning at about seven he wakes me up licking my face. He eats like a bird, which worries me, so I got him special food for older cats. I hope he gains weight soon, I can feel his bones under all that fur...and naturally he likes canned food best. He'll eat a whole teaspoon of that at a time. I'm used to cats who gobble like tomorrow isn't coming...

Bunny Slipper Corrections

Can be found at: www.bust.com/knithappens/oops.shtml. Scroll down to the bottom, the errata file for Happy Hooker is actually a PDF file...

Friday, May 26, 2006

More swappage


I designed the crocheted squirrel and owl--if there's a lot of interest I could write up the patterns. We also have a jordy bag, a picture frame and a squirrel Nutkin pin. I'll post pictures of what my pal sent me on Monday--it's nifty!

Tuesday, May 23, 2006

Cuteness

I've had a bunch of Craftster Swaps going on lately, here are some of the things I created:

For the Suzy Homemaker swap, my partner wanted art and a cute apron. I wasn't sure I could manage an apron at first, because my sewing machine is broken. Then I remembered that I had several circle skirtsI made that came out a little too short. I cut one up and added a bib, trimming and some smiling felt cherries and voila! My partner said she loves it so much she's going to wear it as clothing!


I also attempted a painting based on some vintage fabric I have:


For the Goldfish/Koi swap, which I organized, I made my partner a zippered pouch (my first zipper!) a glasses case out of a felted sweater, and a little fishie magnet.


I also finished up a sweater I designed myself; no pattern, I forgot to write it down and now I forget.

Saturday, May 13, 2006

Help me name my cat!

The new love of my life is this furry gentleman here.


It's about a year since my little kitty Cricket passed away in suspicious circumstances, and today I adopted this guy from a local shelter. He was there because his owner tragically passed away due to cancer. Most of the cats there have been abandoned, but at least he had a legitimate reason for being there. He had my heart from first purr. He's a big guy,seven years old, and oh so juicy and squeezable. This is his shelter picture-I found him on petfinder.com. Give me a few days and his pictures will be looking much happier and showing off his gorgeous fur. He bears the unlikely moniker of Scramece. I have never even heard of this word. Could it be some kind of Italian or Yiddish slang? Current contenders for his new name are Chester and Rufus...any other suggestions? What does he look like to you?

Monday, May 08, 2006

Red Bobbles and Minty Fresh

Here's two shrugs I designed myself. Not that they're anything real innovative, but I like them.The pattern for Minty Fresh is up!
The red bobble one was inspired by Stephanie Japel's Forecast..I liked all the bobbles but have a short attention span. I didn't use any pattern, I just did my favorite 3/3 cable with a 3 stitch bobble by each cable twist. It's the standard make a rectangle and sew up the sleeves thing, but I did the sleeves on circulars instead, then switched the straights and put a garter stitch edging on by knitting 3 at the edges. I used US 11 needles and recycled red bulky acrylic. Unfortunately, it attracts fuzzies magnetically.


The green one was a little trickier. I do have the pattern written down, but as you can see, it was done in three pieces, seamed and the sleeves done on with circulars. I did a seed stitch edging by picking up collar stitches, and cap sleeves by doing some short rows. The coolest thing about this is that it took ONE skein of Aunt Lydia's Baby Denim, with enough left over for a headband! I used US 9 needles. I made a mistake on the fronts somehow, one side has a longer ribbing section than the other. I was in a hurry and not paying attention. I'm happy with it anyway.


Pattern for Minty Fresh:

This is a try-new-techniques pattern for me. You do short rows, increasing, ribbing, seed stitch, dpns and picking up stitches. If you've never done these things before, practise first. They can be a little tricky.


Materials: 400 yards worsted weight cotton. I used Aunt Lydia's Baby Denim. US 9 straight needles, Smaller straight needles for the bottom ribbing, US 9 29" circular needle for the neck, and 5 dpns for the sleeves. gauge: 10 st = 2.5 inches

This is a 34" bust. I don't really know how to make it bigger off the top of my head, but I'm sure you can figure it out.

Right Front: (starting from the top)
Cast on 15 stitches on straight needles. Knit in stockinette stitch for 5". End on a purl row. Next:

1. Knit, increase one stitch at beginning of row.
2. Purl.

Repeat these two rows 4 times. AT THE SAME TIME, when piece is six inches from beginning, cast on 20 stitches on opposite end from increases and continue as before. After all increase rows are done, knit in stockinette for 2", then change to 2/2 ribbing for 4". Change to smaller needles (I used US 3) for 1". Bind off.

Left Front: Reverse all shaping.

Back: Cast on 70, knit in stockinette for 5". Do increase rows 1 and 2 as for fronts on BOTH sides of the back. Continue as for front, but don't cast on those 20 stitches.

Seam up the back and front.

Sleeves: Pick up 72 stitches around armhole on 4 dpns. Knit in stockinette in the round for 1". Change to seed stitch for 3 rows. Here come the short rows:

On top two needles only, knit in seed stitch until you reach the third needle. Knit 1 off the third needle, wrap and turn. Knit back over the top two needles until you get to the first needle. Knit one stich off the first needle, wrap and turn.
Continue knitting back and forth on the top two needles, knitting one more stich before turning each time, until you are knitting three stitches before turning. Bind off.

Pick up stitches around the neck opening on the big circular needle. Try to pick up one stich in each stitch. Knit back and forth in seed stitch until your border is as big as you want it to be.

Buttonholes: With straight needles, pick up stitches on front opening. Work in seed stitch, after two rows, decide where you want the holes to be. When you get to those spots, do a yarn over, ktog where the holes should be.

Sew on buttons, weave in ends and you're done!
 
Creative Commons License
This work is licensed under a Creative Commons Attribution-Noncommercial-Share Alike 2.5 License.